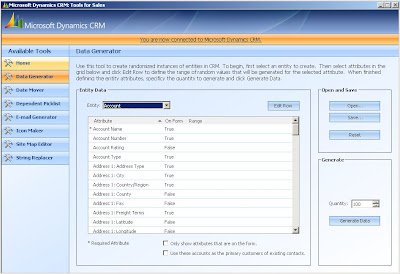
Dynamics CRM Demonstration Tools (Data Generator)
When creating demo environments for sales presenations I like to add a lot of test data to my systems and make it relevant to the custom to which I'm presenting. Microsoft released a tool called "Microsoft CRM Demonstration Tools" which you can download here.
This tool has several useful features:
-Data Generator
-Date Mover
-Dependent Picklist Creator
-Generate Emails
-Generate Entity Icons
-Site Map Editor
-String Replacer
The tool I use the most is the data generator. This allows me to create XML files which will automatically generate entity records in my demo system.
I first go into the demonstration tools and generate an XML file with all the fields I want to populate and put in at least one test value for each field to ensure that I get my data formatted right.
Next I need to get some sample data. For some of it I look around the internet but for the basics I use a great OpenSource tool called GenerateData which you can install on any web server using PHP and MySQL, or you can use their online instance of the tool. This allows you to generate test data for names, addresses, random words, dates, and more.
I usually edit the XML in Visual Studio and reformat it into a more readable XML format which also allows me to expand and contract the nodes. After you load the file in just go to Edit -> Advanced -> Format Document
The problem with editing the document in Visual Studio though is that the Demonstration Tools will not accept an XML file that has any line breaks for paces between the tags. This is when I crack open my favorite text editor called TextPad. I past and then do a select all of the XML data in TextPad. I then go to Edit -> Joint Lines (Ctrl+J).
Next I go to Search -> Replace (F8) and look for "> <" and replace it with "><" to remove the space between the tags.
Finally I try clicking on the line directly beneath the text to ensure that there is no line break after the text. After I save all the info I go back into the Demonstration Tools -> Data Generator, click the Open... button and select the file I created. Ensure that your data is the way you want it, choose the number of records to generate, and click Generate Data. You now have a customized record set to show your customer.
On a final note I use differencing disks on my VPC to quickly set up multiple test/demo environments. If you only use one VPC but you want to delete your old test data before you load in new data you can this tool to create batch delete jobs without using the SDK.


Comments
Post a Comment